

For years, I’ve always wondered “what if.”
What if I never started my seven figure blog, Bargaineering?
I wasn’t a personal finance expert. I wasn’t an expert on anything.
But I hoped that, maybe, just maybe, other people fumbling their way through money could join me and we can learn and grow together. So I started a blog.
Six years later, that blog would be acquired for millions and I changed the trajectory for the rest of my life. I was independent, an entrepreneur, and I learned valuable skills that were valuable in the marketplace, not just to my employer.
All because I started.
If you want to start a blog, you can. You need less than ten minutes.
Let’s do this.
Step 1. Register a Domain
The hardest part about this entire process is finding a domain that you like. Once you have your topic, you want to start brainstorming keywords that match your subject. It may be helpful to pull up a thesaurus to help you find synonyms in case your initial keywords aren’t available (if it’s a single word or two words, it will not be available).
For my scotch blog, I thought of the obvious words – scotch, whisky, whiskey, and threw on the word blog at the end. None were available. Then I thought, drop the blog and go with something like ScotchReviewer or ScotchFanatic, but both are gone. I thought about alternatives to “fanatic” (scotchfan was available but I didn’t like it) and finally settled on addict. I had a few reservations about “addict” given that it’s alcohol, but I got past it.
Some tips about domains:
- Use InstantDomainSearch.com to help you search quickly. It’ll tell you as you type whether a domain is available and even offers suggestions. You don’t have to buy through them (they redirect to GoDaddy), this tutorial will get the domain for free through a hosting company.
- Get the .com version. If you can’t get the .com, try to think of a better name. JD at GetRichSlowly.org made it work with a .org but you can bet the guy who owned the “.com” was pretty happy at all the free traffic he was getting!
- Make sure it’s easy to say and type. DON’T choose a hard to say and hard to type website name. A lot of your early traffic will be from you spreading the word… make it an easy word!
- Make sure you aren’t infringing on someone’s copyright or trademark.
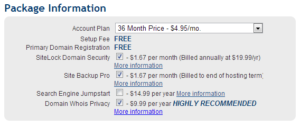
Step 2. Set Up Hosting
Free domain name, unlimited data, Free blog installation, money-back guarantee
Click on the Sign Up Now button.

It may take 24-48 hours for the nameservers to propagate (Bluehost set this up for you already), so if you type in your domain it may not go to your site immediately. I won’t go into the technical details but that information has to get passed to the various DNS (Domain Name System) servers throughout the world and that could take 24-48 hours. Until then, you can still install and configure WordPress but accessing your site may take a day or two.
Step 3. Simple WordPress Install
You’ll be prompted to log in again and then you’ll see this cPanel dashboard (the first time you log in you will have a big video on the screen, subsequent logins will show the cPanel dashboard pictured below):

Click on the cPanel, circled in red, and you’ll see this screen:


Step 4. Done!
Free domain name, unlimited data, Free blog installation, money-back guaranteed.